


Your T.O.V.A. CD not only allows you to install the T.O.V.A. and our fine manuals, it also acts as a boot CD. A boot CD is like the boot floppies of yesteryear; put the CD in your CD (or DVD) drive, restart your computer, and then your computer boots (starts up from) the CD instead of from your hard drive.
Why would you ever need this?
Note: Some systems do not have a CD drive–the T.O.V.A. flash drive is available for these systems to boot the PTE.
After your system restarts, the T.O.V.A. Boot CD menu (Figure 98) will appear. Wait for three seconds, and the PTE will automatically begin to load up.
Note: When you are finished testing in the PTE, you may need to remove the T.O.V.A. CD or flash drive to boot back to Windows.
What should you do if you never see the T.O.V.A. Boot CD menu and your system boots instead back to your OS? You have a couple of options, depending on your OS:
If you see the T.O.V.A. Boot CD menu but you never get past the screen in Figure 98, the PTE may be incompatible with your system’s video configuration. Please boot the CD again and choose “Log debugging information to the T.O.V.A. Device". When this has finished, reboot your system back to your OS. The T.O.V.A. will start up and ask to send your information to T.O.V.A. technical support. If you say yes, this will tell us what kind of hardware you have and what problems may be occurring with it, so that we may fix the PTE to work for systems like yours in the future.
Using your system’s boot device menu is similar to accessing your system’s BIOS, except the boot device menu does not make any change to your system’s settings. The upshot is that you will need to bring up this menu every time you boot to the PTE, but because you’re choosing a “one-time" boot option, you won’t have to remove the T.O.V.A. CD or flash drive to boot back to your OS.
The general steps are these:
Let’s explore these last two steps in detail.
When you launch a PTE session, pre-2015 Mac systems should always boot the T.O.V.A. CD or flash drive automatically. (This was a new feature in the T.O.V.A. 8.2.)
But if that fails, Mac users can simply hold down the ‘Option’ key while rebooting to bring up the boot device menu. The device may show up in the list as “Windows" due to how the volume is formatted.
Many Windows PCs use a similar method: Hold down the ‘F12’ or ‘Delete’ key while rebooting and the boot device menu will appear.
However, the trigger key that you use for this varies between manufacturers and models. When your system first powers on, and it shows the manufacturer’s logo, watch for a clue such as “‘Enter’ to choose a boot device" or “‘Esc’ for boot menu". If that message does not appear, the trigger key might be any of the following: ‘Delete’, ‘Esc’, ‘F1’, ‘F2’, ‘F10’, or ‘F12’.
If holding the key doesn’t work, you may instead need to hit the trigger key at just the right moment, usually right when the manufacturer’s logo first appears (e.g. “Dell", “HP", “Compaq", etc.). When Windows has finished shutting down, the screen will go black or display a message like “no signal". At that moment, start hitting the trigger key repeatedly.
If you see “Windows Boot Manager", you’re too late—you’ll need to reboot your system and try again. If you see “Starting Windows", wait for Windows to load and the T.O.V.A. to start up again, and then relaunch your T.O.V.A. session. If none of the tips above work—and you may have to try them more than once to be sure—you might need to ask your company or organization’s system support or contact your system’s manufacturer for more information on triggering your system’s boot device menu.
And you can always contact T.O.V.A. technical support (section 27) for assistance; we’ll help in any way we can.
Once the boot device menu appears (e.g., Figure 99 or Figure 100), stop hitting or holding the trigger key. If you are booting the T.O.V.A. CD, highlight your CD/DVD drive in the list (look for ‘CD’ or ‘DVD’ in the name), and press ‘Enter’. Likewise, if you are booting the T.O.V.A. flash drive, look for ‘USB’ or ‘Flash’ in the name.
Note: This section is for Windows PC users.
If you insert a T.O.V.A. CD into your CD-ROM drive and restart your system, the system should boot to the CD, meaning that it will try to load the T.O.V.A. Precision Test Environment instead of running Windows. If it does not, however, don’t panic! You probably just have a different boot configuration. We can probably change your system so that it will try to boot to the CD before the hard drive. It just means we’re going to have to change your BIOS settings. Okay, you can panic now.
Just kidding. The truth is that configuring your BIOS is pretty easy. Telling you how to configure your BIOS is virtually impossible. This is because almost every system does it differently, and only some of them give you helpful clues along the way. You may have to reboot your system two or three times before we figure it out. But we will figure it out.
It may help you in performing this task to imagine that you are a BIOS ninja. It sounds ridiculous, and it is. But to change your boot order, we will need to strike quickly and slip in and out without disturbing the environment, and most of all, adapt to the unexpected. That sounds like a ninja to us, but if it sounds like a platypus to you, hey, it’s your imagination.
This is the easy step, because you’ll always have to do this first. Unless your computer is currently off, in which case step one will be Turn your system on instead.
When you first reboot your system, you will likely see some kind of logo, and some information about your RAM or processor you probably usually ignore. You will hopefully also see something like “Press F10 to enter Setup” or “Hit DEL for BIOS”. If you don’t see it the first time, reboot your system and look again.
There is always a chance that there will not be any such helpful message. One of our test systems, for instance, does not. As it turns out, the key to press is ‘F1’, but we’ve seen quite a few others. If you have no message, try the following:
‘Delete’, ‘Esc’, ‘F1’, ‘F2’, ‘F10’, ‘F12’
Here’s where you’re gonna need those ninja-like reflexes. Whichever key it turns out to be, it will need to be pressed while that initial splash screen appears, which could be as long as twenty seconds or as short as one. Furthermore, even if you press the right key, it may not immediately respond. If none of those work, and you may have to try them more than once, you might need to contact your company or organizational system support, the tech support that came with your system, or you can always try T.O.V.A. technical support.
When you’ve successfully entered the BIOS Configuration program, you will most likely see a DOS-style application, without windows or a fancy GUI. Use your ninja powers of perception to examine your environment. There will probably be some basic directions somewhere on the screen telling you how to navigate the program. As with the last step, no two BIOS utilities are alike, so we can’t give you any specific instructions.
We can tell you roughly what you are looking for. You want to change the ‘Boot order’ or ‘Boot configuration’. Essentially, have your keen ninja senses open for the word “Boot”. You will probably not find it in the top level menu, so don’t be surprised if you have to check two or even three levels deep for the setting.
Note: You should be careful not to change anything else while you’re here, but every BIOS utility we have ever seen has a way to exit the BIOS without saving changes. If your ninja skills fail you, and you think you might have unintentionally changed a setting, Don’t panic! Slowly, carefully follow the instructions on the screen to exit the BIOS without saving. Then reboot your system and try again.
Eventually, hopefully, you will find a setting for something like ‘Boot Order’, ‘Boot Priority’, or ‘Boot Sequence’. This is your target! Again, we wish we could tell you specifically how to change this setting, but we can tell you what you are trying to do.
Every time your system reboots, it checks a sequence of devices, one after the other, looking for an operating system. Once it finds that operating system, it stops looking. Among these device may be: Floppy drive, more than one hard disk drive (HDD), USB drive, CD and/or DVD drive, and more. What we want to do is change this sequence so that before it checks your hard drive, it will check your CD drive. How all those other devices get prioritized is up to you.
Now that we’ve changed our boot order, we need to slip out of here unseen, without accidentally changing anything else. Examine the directions carefully, looking for a key that will let you ‘Save and Exit’ or ‘Save Changes’. You may be able to do this from this screen or you may have to return to the main menu. If you’ve changed the boot sequence and you haven’t touched anything else, save your changes and exit.
Now reboot your system with the T.O.V.A. CD in the drive and try again. This time it should boot to the T.O.V.A. PTE. Congratulations! Your mission is complete, and your honor is intact!
If it didn’t work, you may want to review the directions, as unhelpful as they are, and try again. Or you may want to call T.O.V.A. Ninja, er, we mean, technical support. Our highly-trained operators will be honored to serve you.
On a very few systems, we’ve found that giving the CD drive boot priority can cause the hard drive not to boot. The system checks for a CD and, if the CD is not there, assumes there’s nothing else to boot. In this case, you will want to reverse your changes above and use the instructions in the next section (section 31.5.2) for the boot device menu.
Note: To update your flash drive, see section 31.5.6.
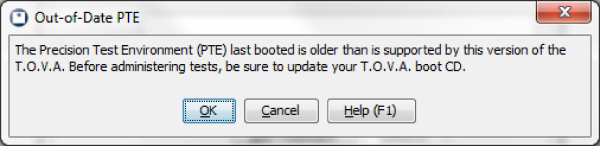
If you are using a CD as a boot CD, it is critical that you update it every time you update the T.O.V.A. so that you’re using the latest version of the PTE. While we provide no automated way to do this on Windows, the T.O.V.A. 8 CD itself was a CD-RW and can be updated by most CD-RW drives and CD burning software. If you do not have a T.O.V.A. CD, you can burn the T.O.V.A. CD image to any blank CD-R.
The T.O.V.A. 8.2 for Mac added a script for downloading and burning the latest CD image all in one step.
The script will download the latest version of the CD image from our website and then burn it to the inserted CD. When it has finished, your CD is up-to-date, and you can use the CD to boot the PTE or reinstall that version of the TOVA software.
Downloading the latest install CD image is easy, but the image can be quite large, over 150 MB. Note: This can take awhile even on broadband connections.
Once you’ve downloaded the image, you need to burn it to a CD.
The ‘Update_CD’ script (section 31.5.4) will automatically download the latest T.O.V.A. CD image and burn it your blank or rewriteable CD. You can also use the Disk Utility to manually burn a CD if you prefer to use a GUI.
There is no standard way to burn a CD under Windows, so we are unable to provide thorough instructions. If you are uncomfortable with these directions, you may want to consult your tech support staff.
If that option is not available to you, choose to ‘Open’ the .iso in your CD burning software. Because different systems have different burning software, we cannot guide you through this; you will need to navigate your own software to burn the .iso image to the CD. Note: You do not want to just ‘add’ or ‘copy’ the .iso file to the CD. You want to burn the image to the disc.
The burning process should take only a few minutes. When it’s done, you’ll have a fresh new T.O.V.A. CD with the latest PTE.
The T.O.V.A. flash drive is included with your T.O.V.A. kit. It’s a USB stick that contains installers and documentation for the T.O.V.A. and can be used for booting the PTE.
Some systems may already be configured to boot from a flash drive, some will need to be reconfigured, some will need special actions (pressing ‘Esc’ or ‘F12’) at the boot screen, and a few systems simply will not do it.
If you do not have a T.O.V.A. flash drive, please contact T.O.V.A. customer service. If you have a T.O.V.A. flash drive, you can select it as a launch preference for booting the PTE:
Mac OS X 10.11 users will need to use the keyboard to select the T.O.V.A. flash drive. Hold the ‘Option’ key after the startup chime when rebooting to bring up a menu of boot devices. Select the flash drive in the list. It may be labelled “Windows" due to how the drive is formatted.
If you have problems using the T.O.V.A. flash drive, contact T.O.V.A. technical support. We will do our best to help you get it working or offer alternatives.
If you are using the T.O.V.A. flash drive to boot the PTE, it is critical that it remain up-to-date, with a version of the PTE that matches the T.O.V.A. software. If you have a Windows PC, contact technical support for information on updating your T.O.V.A. flash drive or creating or ordering a new T.O.V.A. flash drive.
If you are using a Mac, the T.O.V.A. 8.2 for Mac added a script for downloading and burning the latest PTE image to your T.O.V.A. flash drive all in one step.
The script will download the latest version of the PTE boot image from our website and then burn it to the T.O.V.A. flash drive. Warning: to save download time, this is a different image than the writable Installer image that is shipped on the T.O.V.A. flash drive. The previous contents, including documentation and installers, will be erased. Please save any files you have written to the flash drive before running this script. When it has finished, you can use the T.O.V.A. flash drive to boot the latest PTE.
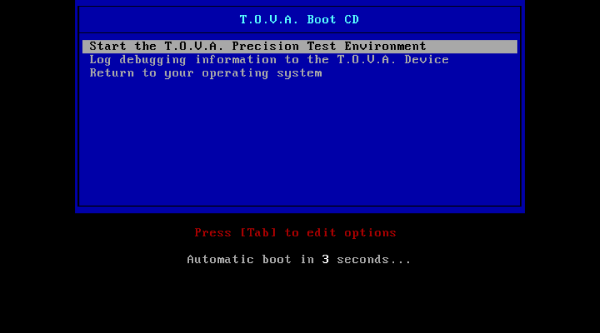 The PTE Boot CD menu appears for only three seconds
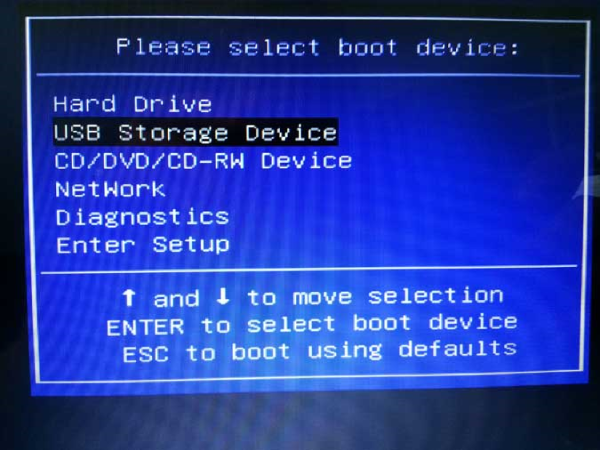 For the T.O.V.A. CD, look for “CD" or “DVD"
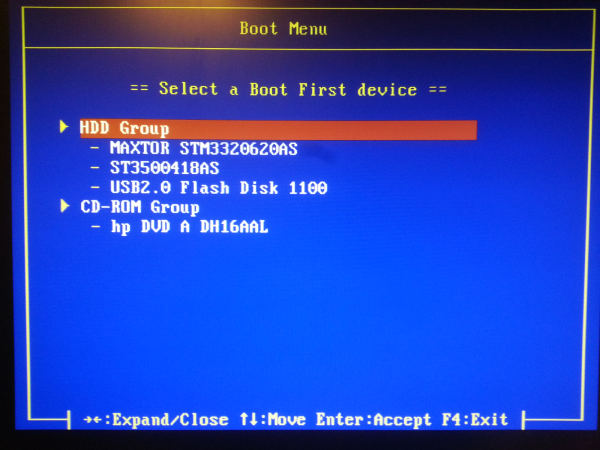 For the T.O.V.A. flash drive, look for ‘USB’ or ‘Flash’
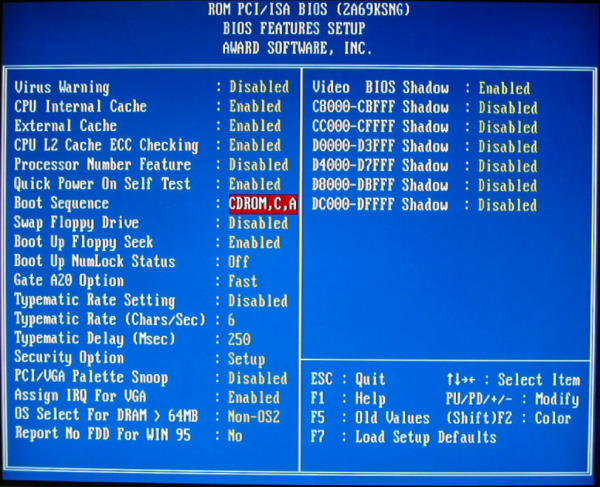
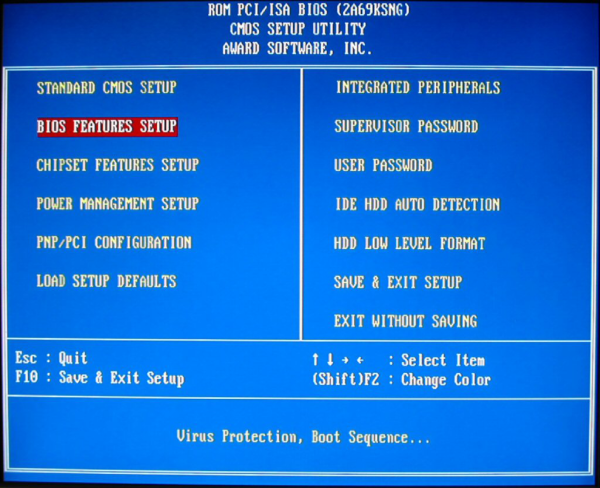 Award BIOS start screen, with the cursor on the correct section.
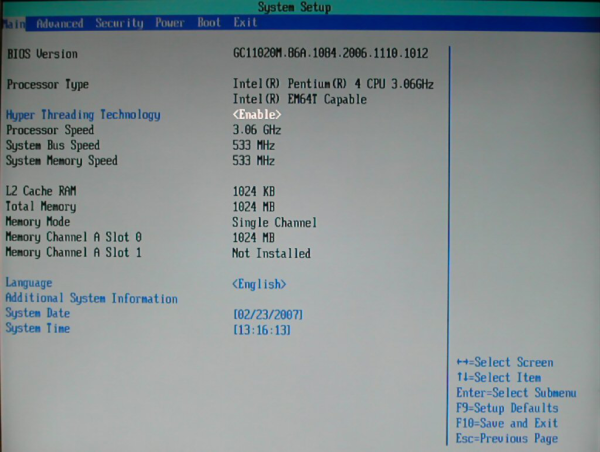 Intel BIOS start screen. You’ll want the ‘Boot’ tab (at the top).
 Award BIOS setup page, with the boot order entry highlighted.
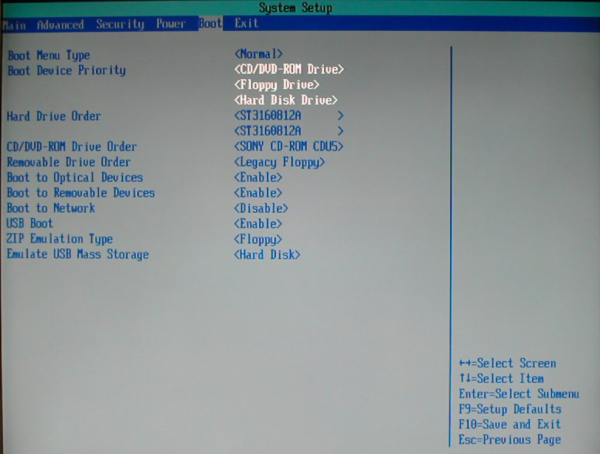 Intel BIOS boot screen, with the boot order entry highlighted.
 Keep your T.O.V.A. CD up-to-date
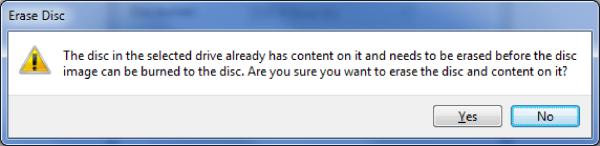 Erase warning—choose ‘Yes’