


In this section of the manual, we’ll give you practical, basic instruction in how to administer the T.O.V.A. test.
There’s a simple series of steps you’ll need to do in order to administer the T.O.V.A. test:
Preparing the subject is crucial, because it assures that the test is administered properly and replicates the same conditions as the T.O.V.A. norms. This includes when, where, and how the test should be administered.
You may also want to enter the subject and session information before the subject arrives. Next, we’ll tell you how to do that.
Administering a T.O.V.A. test starts at the main window. Here you may select a subject or create a new subject.
Creating a new subject is easy.
Notice first the red labels on Birthdate and Gender (Figure 27). These are the only required fields for creating a new subject. While entering a subject name is usually helpful, some users may prefer to leave out the subjects’ names altogether to better protect personal health information.
Note: Entering dates in the T.O.V.A. is easy, but the format depends on the preferences that are set in your operating system (e.g., Windows). For instance, if you’re in the United States, dates are most likely in the format ‘mm/dd/yyyy’, but in Europe they’re probably ‘dd/mm/yyyy’. When entering the birth date, please check the age to make sure you’ve entered it right. A shorter 10.8-minute test is administered to subjects under six, so an incorrect date of birth can result in the wrong test format.
Notice also our custom field, ‘Favorite color’. You will not see this field, of course, but you may see other custom fields that your organization has created. For more information on Custom Subject and Session fields, see section 25.3.
That’s it! You’ve created a new subject in the T.O.V.A. .
If you’ve already created the subject, the next step is to find and select the subject you want to test. Near the top of the main window (Figure 26) is a search bar. Here you can search for the subject you want to test by name, subject number, birthdate, test date, or any custom fields you’ve created. This will be an important tool once you’ve administered a few dozen tests.
For more search techniques, see section 35.2. Another way to find your subject quickly is by clicking on the column headers. Click once to sort the table on that field and again to reverse the sort order.
Once you’ve found the subject you want to test, highlight the subject and click ‘New Session’.
Now that we’ve selected a subject and started a new session, we can enter a little information about this test session and launch the session. You should choose now between administering a Visual or Auditory test and make sure that the age and test date is correct.
Note: It is critical that the subject’s gender and age is correct. Any mistake here will invalidate the accuracy of the T.O.V.A. report, since comparison to the T.O.V.A. norming study must be done for the proper gender and age group.
Adding treatments, including medications and dosages, will aid in interpreting the test. In addition, you can enter the name of the tester, fill in any custom fields, or add comments, but none of these are required before administering a T.O.V.A. test session. And you can always add or modify session information after the session has been administered.
At the bottom of this window, under ‘Session Launch’, you will see a brief description of how the session will be launched. The settings here will always default to what the administrator has specified in the Preferences (section 25.12), but if you want to change these settings for this session, click on the ‘Options’ button.
From the New Test Session window (section 18.4), click ‘Instructions language’ to change the test instruction settings for the session you’re about to give. This is also where you can mute the instruction audio, if you prefer to read and advance the instructions at your own pace. See section 33 for more information on the T.O.V.A. test instructions.
When you’ve chosen your settings, click ‘Close’, or choose ‘Save as defaults’ if you’d like to make your changes permanent.
Let’s say you decide you want to prepare your system to launch the PTE session, but you want to ‘Reboot later’ after you finish writing an email. Any change you want to make from the way the T.O.V.A. usually launches a session, you can make here.
Once you’ve configured the session launch options how you want them for this session, click ‘Close’. If you’d like to save these as your new default launch options, choose ‘Save as defaults’ instead. For more information on your launch options, see section 25.12
Now let’s look briefly at the two testing environments.
The T.O.V.A. 8 added a new kind of T.O.V.A. test session, the External Audio/Video session, that does NOT require rebooting your system. That’s because instead of relying on your system clock, video, etc., the new T.O.V.A. hardware handles the timing itself.
What an External A/V session DOES require is a desktop system or a laptop with an external monitor (and speakers for the Auditory test). See section 32 for more information.
Note: Please make sure to disable, at least temporarily, any Sleep/Standby/Hibernate power settings for your system. Because External A/V testing does not use the keyboard or mouse, some systems will shutdown due to inactivity. See section 34.8 for more information.
The T.O.V.A. also continues to offer the Precision Test Environment (PTE). Using the PTE requires rebooting your system, so be sure to save your work in other applications before launching the PTE.
For more information on the Precision Test Environment, see section 31. For information on PTE launch options, see section 25.12.
Once you’ve entered all the test session information and set up the launch as you want it, click ‘Launch’ to start the T.O.V.A. test session. As you can see from the screenshots above, both testing environments have the same basic steps to administer a T.O.V.A. test.
Note: Always make sure that your PC is plugged into a power outlet during test mode. A low battery during a test session may cause the test data to be lost.
Note: If you’re administering an Auditory T.O.V.A. , you will skip this step and go right to test instructions, section 33.
There are more different kinds of monitors than ever, and because accurate, precise timing is so critical to testing, we’ve added a new feature to the familiar T.O.V.A. microswitch.
With this sensor and a brief 10-to-30-second calibration, we can conform the timing of the T.O.V.A. test to idiosyncrasies in your monitor. There will be some monitors that are too unpredictable for the T.O.V.A. to work with. By performing this calibration step, we can recognize and alert you if your monitor’s timing will be out of range.
Calibration will take 10-30 seconds. Once we’ve calibrated the T.O.V.A. to your monitor, the T.O.V.A. will store that data, so you only have to calibrate once for EAV testing and once for PTE testing (See section 32 for more on the differences). Note: If you install a new monitor or video card, it’s important that you recalibrate the T.O.V.A. to that new hardware.
Note: See section 29.4 for more information if you encounter problems during calibration.
The next step is giving the subject instructions on how to take the T.O.V.A. test. Click the ‘Test Instructions’ button to start the multimedia test instructions. See section 33 for more information on test instruction languages, controls, and options.
After receiving the test instructions, the subject should take a two-minute practice test. When you click ‘Practice Test’, the subject will receive a few final instructions; then the subject will be prompted to click the microswitch to begin the practice test.
When the practice test is complete, the T.O.V.A. automatically displays the results. If there were a lot of Omissions or Commissions (Figure 35), perhaps the subject needs further explanation. The subject can re-take the practice test if necessary.
When you click ‘T.O.V.A. Test’, the final instructions before the T.O.V.A. test will be given, and the subject will be prompted to click the microswitch to begin the T.O.V.A. test.
If the T.O.V.A. test is interrupted (by pressing ‘Esc’ or if there is a hardware failure), a message will appear asking the user to ‘Continue’, ‘Restart’, or ‘Abort’ the T.O.V.A. test. For the best results, we recommend that you ‘Restart’ any interrupted test. Click ‘Abort’ to stop the test before it is finished—you will be prompted to either save the unfinished test’s data or erase it. Click ‘Continue’ to resume the test where the subject left off. Any interruptions will be noted in the test data and on the report.
Once the T.O.V.A. test is completed, a summary of the finished test will appear. If you are using the PTE, this will appear after you boot back to your OS. Make sure to examine the summary before saving the data. If there are very few button presses, perhaps the subject did not understand the test instructions. If not all the stimuli were shown, the test may have been aborted before it was complete. In either case, it may not be worth using a test credit to save the T.O.V.A. data, and you may choose to ‘Erase data’.
If the summary information looks fine, choose ‘Save test results’ to retrieve the T.O.V.A. test results and store them in the T.O.V.A. database. If you’re not sure whose test this is, you can view the subject information by clicking ‘More information’.
Note: You must use a test credit to save the T.O.V.A. test data. If you ‘Continue without saving’, the T.O.V.A. test results will remain on the device, but they will be lost the next time a T.O.V.A. test is administered. For more information about test credits, see section 20.
Next, you have option to view a report on the test data immediately. Choose ‘View report’ to see a report now or ‘Cancel’ if you’d prefer to see the report later. The report can be viewed afterward at any time. You can also choose ‘Add information’ to add/edit session information before you view the report.
For more information on the T.O.V.A. report, see section 19.
Congratulations! You’ve just administered a T.O.V.A. test!
The T.O.V.A. test data is now stored in your database along with the subject information. So what do you do now?
When you are finished using the T.O.V.A. for the day, please exit the T.O.V.A. application by clicking ‘Quit’ in the main T.O.V.A. window. There is no operation to “power down” the T.O.V.A. USB device and no need to disconnect the T.O.V.A. hardware when not using it, so we recommend that you keep the T.O.V.A. USB device attached. If it’s convenient, you may uninstall the T.O.V.A. hardware when you are not using the T.O.V.A. application (see section 17), but we recommend that you save your test data first.
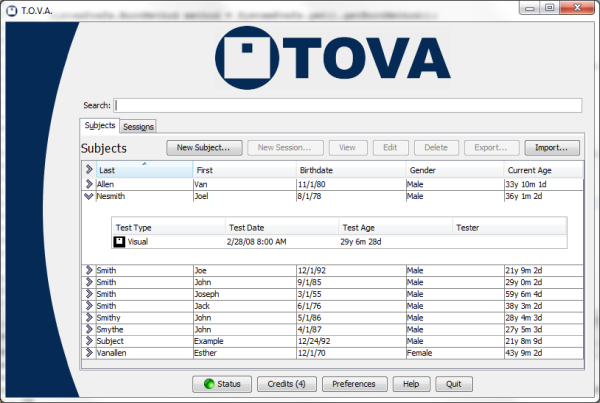 Main T.O.V.A. window
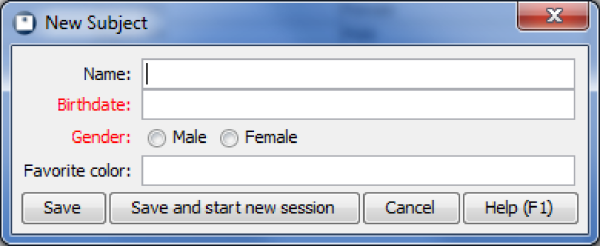 New Subject window
 Choose session options
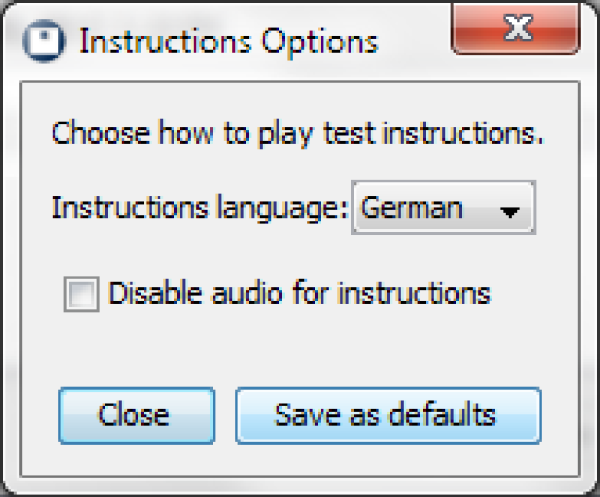 Choose a different language or mute the audio
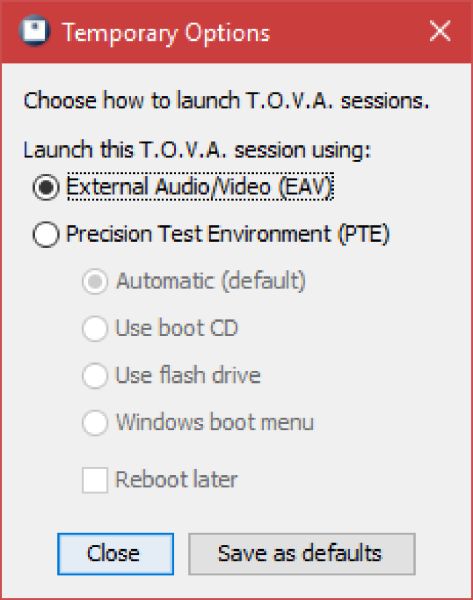 Change launch options for this session
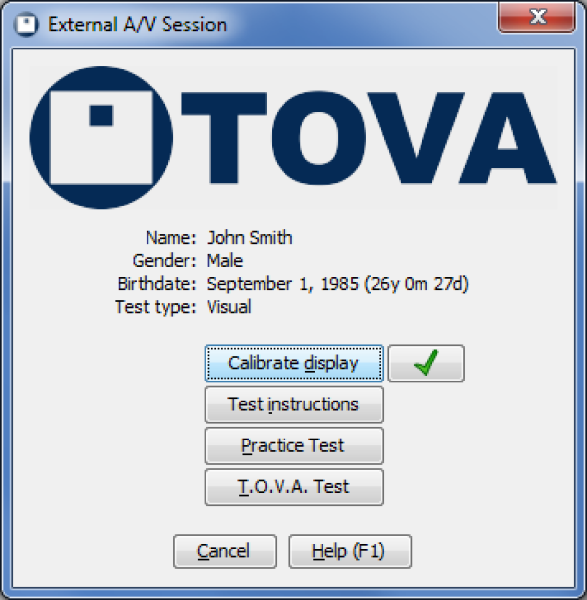 External A/V session
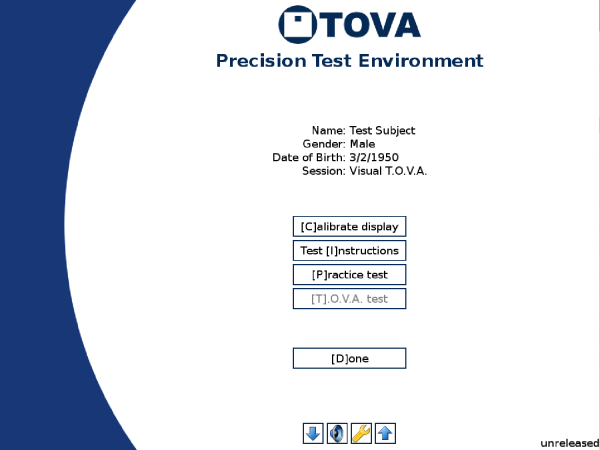 The Precision Test Environment
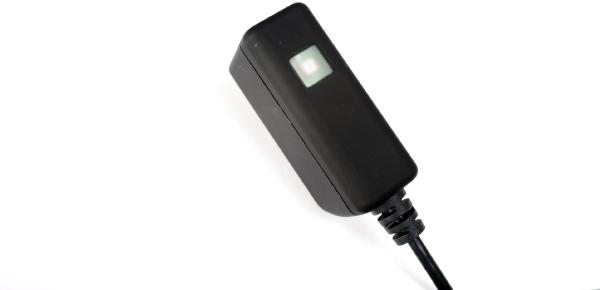 Microswitch light sensor
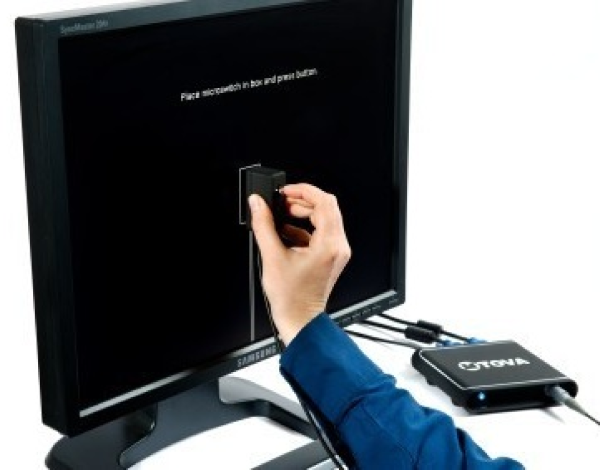 Calibrating the T.O.V.A. to your display.
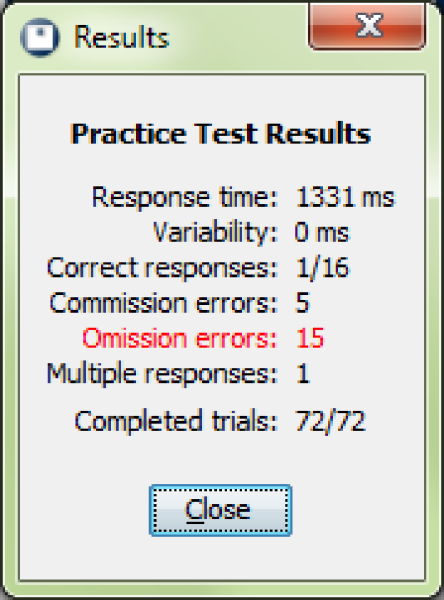 Results of a misunderstood practice test
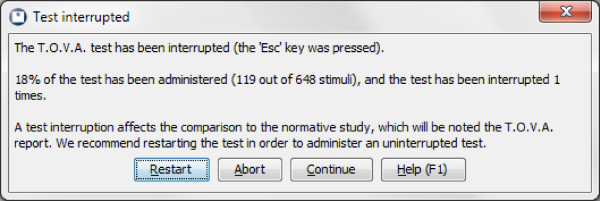 Interrupted External A/V test
 This test was completed with very few button presses.
 View the report on this T.O.V.A. data?