


This reference section deals with the T.O.V.A. hardware, what it does, and how to diagnose hardware problems.
Not only does the T.O.V.A. USB device securely track your test credits, it’s also a miniature computer! Let’s look briefly at all that the T.O.V.A. USB device does when you administer a test:
Note: You must have a T.O.V.A. USB device to administer tests in the T.O.V.A. .
The light on the front of the T.O.V.A. USB device indicates to you and to us what the T.O.V.A. USB device is doing. It’s also a button you can press if you ever need to reset your T.O.V.A. USB device . It’s important to note, however, that the reset light can also be a distraction to your subjects, which is why we recommend that you keep it out of sight during testing. The microswitch has a nice long cable for just this reason, and the reset light is recessed somewhat to make obscuring it that much easier.
Here are the colors you might expect to see using the T.O.V.A. :
| Color | Status | Description |
| Yellow | Powered | Device is finding power, but is not recognized by your OS.* |
| Green | Ready | Device is attached and recognized by your OS. |
| Blue | Testing | Device is running the T.O.V.A. test. If the device is disconnected or loses power while the light is blue, your test data will be lost. |
| Red | Error | An error prevents testing (e.g., microswitch unplugged). The red light may blink to indicate a specific error. |
| White | Switch down | The microswitch is being pressed (It doesn’t turn white during testing, to avoid distraction). |
* Note: A yellow light may indicate you haven’t installed the T.O.V.A. USB device drivers. You should install the T.O.V.A. software before you setup the hardware. See section 9.12 for information on installing the T.O.V.A. .
To use the T.O.V.A. software, you will need T.O.V.A. 9 hardware. You cannot administer the T.O.V.A. test with T.O.V.A. 7 or T.O.V.A. 8 hardware. Please contact T.O.V.A. Customer Service (section 27) to purchase a T.O.V.A. kit before installing the T.O.V.A. software.
If the T.O.V.A. does not recognize that your T.O.V.A. USB device is attached, try the following:
Sometimes there can be communication problems with the T.O.V.A. USB device . There are two common causes of this:
If the above doesn’t resolve the problem, try the “Device not found" steps at section 29.1.3. If it continues to happen, there may be a problem with your PC or your T.O.V.A. hardware–contact T.O.V.A. technical support for help (section 27).
If ever your screen will not show the correct picture or your speakers are making a sound they shouldn’t be, you can reset the T.O.V.A. USB device by pressing the button (that little light) on the front. That will return audio and video control to your system. If you’re still having audio or video problems then, it’s probably not the T.O.V.A. USB device causing them.
Note: You should also make sure that the USB cable is properly attached, as that power is needed to carry the audio and video signals.
Note: These instructions are for Windows. If you encounter problems installing the T.O.V.A. USB device drivers, you may need to manually install the hardware. For instance, if the T.O.V.A. hardware was attached before the T.O.V.A. software was installed, you could encounter a scenario where the drivers do not install correctly. This is a Windows glitch, but fortunately it can solved:
select the ftdi folder, and choose ‘OK’. Click ‘Next’.
Congratulations! You’ve successfully fixed a driver installation problem.
Instead of mice or keyboards (both unpredictably inaccurate), the T.O.V.A. uses a standardized microswitch which performs reliably and consistently across literally millions of presses. The T.O.V.A. microswitch has a built-in light sensor that we use to calibrate your display. For more information on calibration, see section 18.5.1.
To connect the new microswitch to the T.O.V.A. USB device , line up the arrows on the top of the connector with the top of the T.O.V.A. device and push it gently into the port. You do not need to twist or turn or squeeze in any way.
To disconnect the microswitch from the T.O.V.A. USB device , grasp the connector on either side and pull it gently but firmly out from the device. Again, you do not need to twist or turn or squeeze the connector in any way.
First, make sure that the microswitch is plugged into the front of the T.O.V.A. USB device . If it’s not, or there’s another microswitch error, the light on the front of the T.O.V.A. USB device may be red.
Second, make sure the microswitch ‘feels’ right. With a gentle press, it should make a sudden transition to the pressed state with a single click. If it feels mushy, or very hard to press, or something is rattling in the case, you’re going to need a new microswitch.
Third, go to ‘Help’, ‘Check T.O.V.A. hardware’, ‘Check microswitch’ to test your microswitch button. If there is or was a microswitch error, it may be indicated on this window as well. See section 29.3 for more information.
Finally, if the microswitch intermittently works and then doesn’t, it should be replaced IMMEDIATELY; a test taken with a faulty microswitch can’t be considered reliable.
If you need a new microswitch, contact T.O.V.A. customer service (section 27) as soon as possible and let us know how fast you need a new one. We’ll send you a new one right away! Note: We might ask you to send us the old one for quality control purposes.
The Check Hardware window has information and tools for testing and fixing the T.O.V.A. USB device , the microswitch, and your system’s connections to them. Let’s review them briefly:
On the right side of the Check T.O.V.A. hardware window you are given all the information about your T.O.V.A. hardware.
Below these are more advanced functions. Note: You should not use these without direction from T.O.V.A. technical support.
You must calibrate your display to administer the Visual T.O.V.A. test. Whether it’s a modern LCD display or a big, old CRT monitor, every display has some delay, however brief. Calibration allows the T.O.V.A. to properly account for your display’s specific timing, so that the results of the T.O.V.A. will be as precise and accurate as possible.
Most displays will calibrate successfully. However, others may encounter errors during calibration.
The first thing you should do if your calibration fails is try it again. Make sure that you’re holding the microswitch so that the bottom of the microswitch (where the photodiode window is) is directly touching the surface of your screen, but not pressing down hard. The button should be facing outward from the screen and the cord should be hanging down from the back of the microswitch, as indicated on the calibration diagram (Figure 89). Calibration may take a minute or so, but try to hold the microswitch still.
Secondly, some displays may take a few minutes to finish warming up. Restart the calibration and leave the message “Place microswitch in box and press button” on the screen for at least two minutes before starting a second time.
Thirdly, your display may be too dim, and you should increase the brightness and try calibration again. Once calibration is complete, you can lower the brightness again as appropriate.
If you continue to get the same error, the problem can be diagnosed here:
Once you get a successful calibration, you should be good to administer the test, and you won’t need to recalibrate every time. If you replace your system’s monitor or video card, however, you should always recalibrate the T.O.V.A. to the new display hardware.
If you continue to receive errors, your display may not be capable of accurately administering the T.O.V.A. test. The T.O.V.A. will not administer the T.O.V.A. Visual test on a display unless it can be successfully calibrated. Please contact T.O.V.A. technical support (see section 27), so we can get more information about your monitor and recommend other models that will work better.
Audio is an important part of the T.O.V.A. . The T.O.V.A. test instructions are spoken by your PC. The auditory T.O.V.A. test complements the visual test by measuring attention differently. As a result, we want the T.O.V.A. to work with your system’s audio hardware. Are your test instructions too loud and your auditory test too quiet, or vice versa? If you’re having sound problems with the T.O.V.A. , we can help you fix that.
The PTE and EAV tests each have their own volume settings. The sections to follow can help you address volume problems in each testing environment, but first a couple of general audio tips.
The easiest way to control volume is by raising or lowering the volume on your external speakers. However, if you have no external speakers–a laptop with a basic PTE hardware setup (section 13.1), for instance—you can skip to the next section.
If you can’t hear the Auditory test or the test instructions, check your speakers first: Are they plugged in, turned on, and turned all the way up?
The test instructions are accompanied by audio by default. Press the space bar to pause or restart the instruction audio and the ‘S’ key to turn the audio on (or off) while the instructions are playing. Note: With the instruction audio off, the instructions must be advanced manually, using the right arrow key.
For audio problems in the PTE, use the PTE volume controls. From the main PTE menu, press ↑ to raise the volume one step and ↓ to lower it. Each time a brief audio clip will be played, and a number will be displayed. The volume level you choose will be stored when you return to your OS and preserved for your next PTE session.
Note: These volume controls are only available from the main PTE screen and not during the T.O.V.A. test or the Test Instructions.
A Note on the Auditory Test: If the target (higher) tone is significantly louder than the nontarget (lower) tone, the problem is the bass response of your speakers. This can often be an issue with laptops, and you will need to use different speakers to resolve this. Contact T.O.V.A. customer service for recommendations.
If your sound works fine in your OS but does not work in the PTE, the PTE may not be selecting the correct audio hardware. You may see an audio error or the speaker button at the bottom of the main PTE menu will be disabled. Click the wrench button (or press ‘A’) and then choose ‘[C]hange audio device’. This will present a menu of all of the audio devices the PTE can detect.
Select a device, even if there is only one listed, and an audio clip should play at the current volume to test out the device. If the audio played correctly, great! Resume your PTE test session or click ‘Done’ to return to your OS. Your device selection will be preserved.
If you get an error after choosing the audio device, go back to ‘Change audio device’ again and select a different audio device, if any. If you try all the devices here and no audio plays, your audio hardware may be incompatible with the PTE. If this is your situation, please send your PTE Hardware Information to T.O.V.A. tech support immediately—we are doing our best to make the T.O.V.A. PTE work for every sound card, and information from your system can help us do that. See section 34.1 for more information.
Note: Please use this screen carefully, preferably on the advice of T.O.V.A. technical support. The main PTE volume and mixer defaults will work best for most systems, so if it ain’t broke, don’t fix it.
While the T.O.V.A. PTE has gotten increasingly proficient at recognizing hardware and adjusting settings to the right default levels, some PCs may still need additional tweaks. If your audio is too quiet, too loud, or distorted somehow, and the main PTE volume can’t correct the problem, the latest PTE version has an audio mixer that might help you.
Click the wrench button at the bottom of the main PTE menu (or press ‘A’) and then choose ‘[A]djust audio levels’. Here you will be able to see and adjust all the channels for your PC’s audio device. The bar indicates the volume level, and the box next to it whether the channel is turned on or off.
Please note that this screen is not about selecting a specific channel to be used by the T.O.V.A. , but rather the audio levels contributing to the sound in the T.O.V.A. . Some may be best turned off, and some may have no effect whatsoever. We are happy to help you find the settings that will work best for your system.
USB speakers plug into a USB port just like the T.O.V.A. USB device, instead of plugging into your audio speaker jack. We sometimes recommend these for PTE audio problems because they are almost guaranteed to work with the PTE—other speakers may or may not. Please only use the USB speaker models recommended by T.O.V.A. customer service, and make sure to set the audio calibration value provided for your speakers.
Note: The External A/V test requires external speakers plugged into your T.O.V.A. USB device . If you have a laptop with no external speakers, for instance, you cannot run the External A/V test.
During an EAV session, your computer can play audio instructing the subject in taking the T.O.V.A. test. However, during an EAV Auditory test, the T.O.V.A. USB device will play the tones. Therefore you have two different audio sources (your computer, the T.O.V.A. USB device ). You also have multiple volume controls: your OS’s volume (which may have more than one control), the T.O.V.A. USB device ’s volume, and your speakers’ volume. Here are steps you can follow that will solve most EAV audio problems:
We have noticed that sometimes you can hear noise with the EAV setup that you don’t hear if the speakers are plugged directly into your PC. We’ve found this is specifically the case with some laptops—that’s because the laptop is actually producing the noise.
While the T.O.V.A. USB device may not be producing this noise, it might be amplifying it. Fortunately, the static or whine should go away during Auditory testing, when the PC sound is cut off. If you find that it does not, try different speakers or contact T.O.V.A. tech support.
 Front of the T.O.V.A. USB device
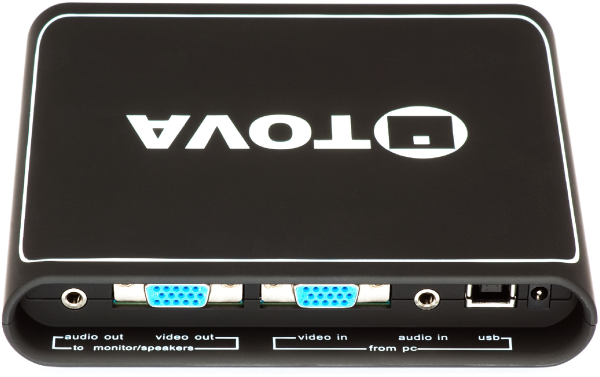 Back of the T.O.V.A. USB device
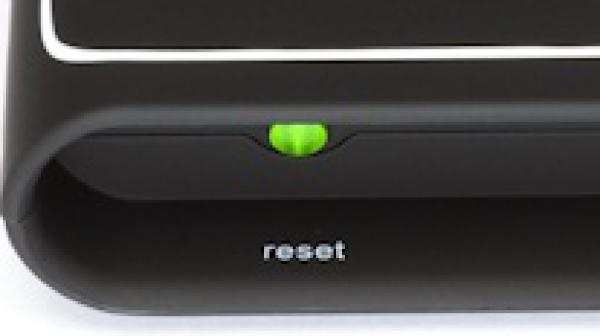 Reset light/button
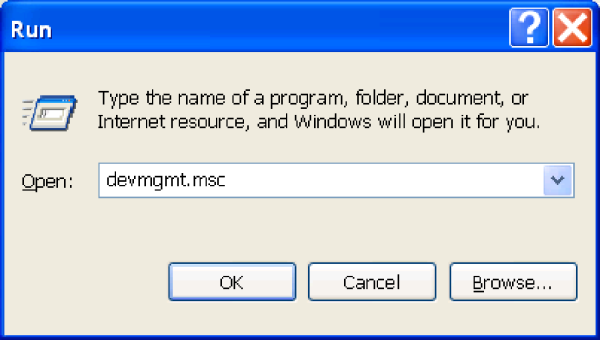 Run the Device Manager
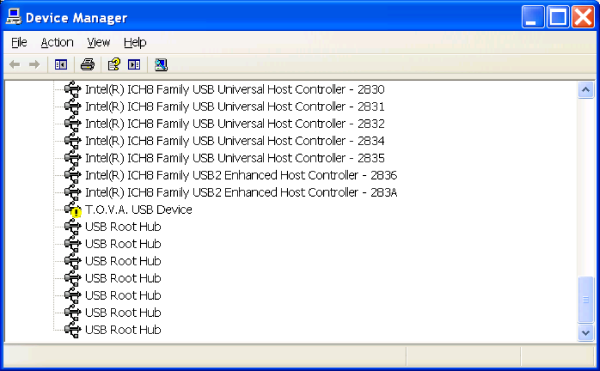 Missing driver in the Device Manager
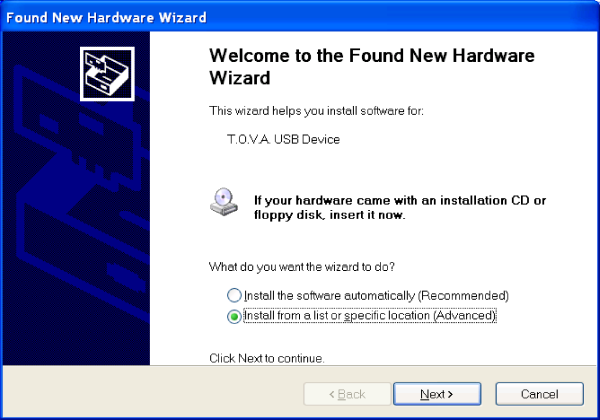 Found New Hardware Wizard
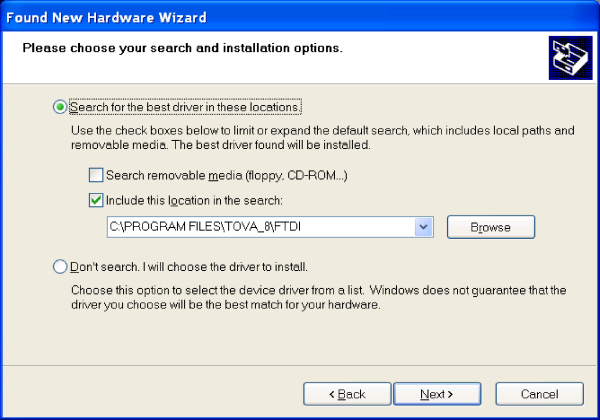 Direct the wizard to the T.O.V.A. drivers
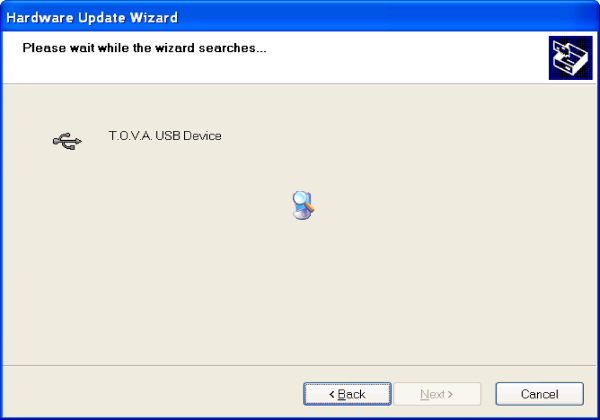 Searching for and installing the drivers
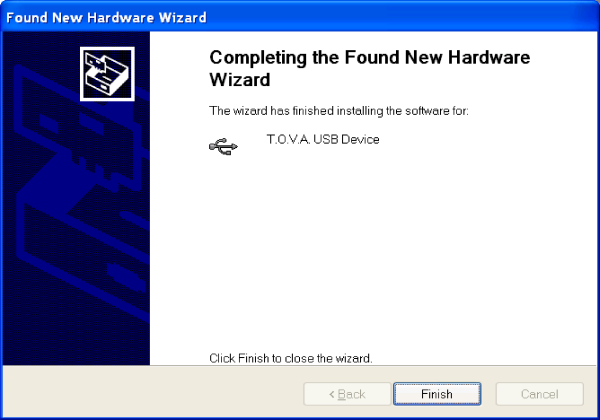 T.O.V.A. drivers installed!
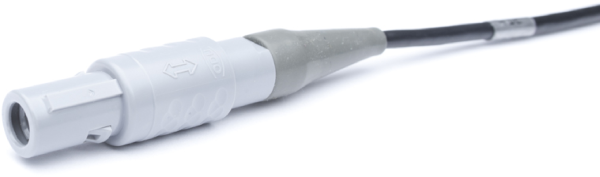 Connector
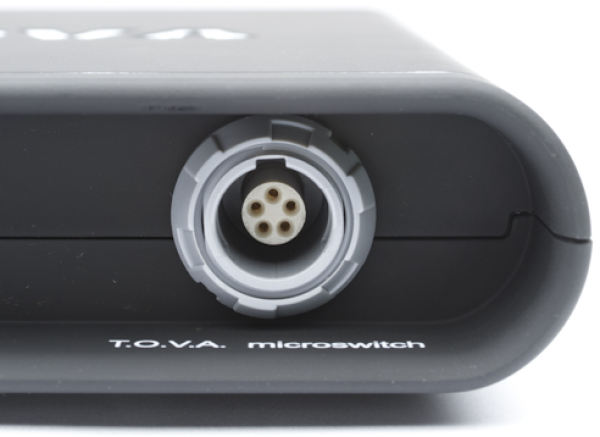 Microswitch Jack
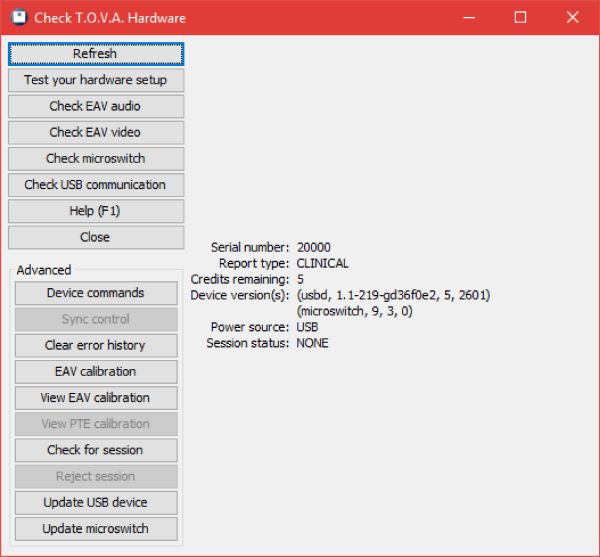 Check T.O.V.A. hardware window
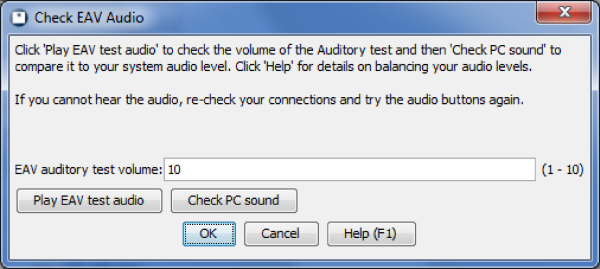 Check the audio volume for EAV testing
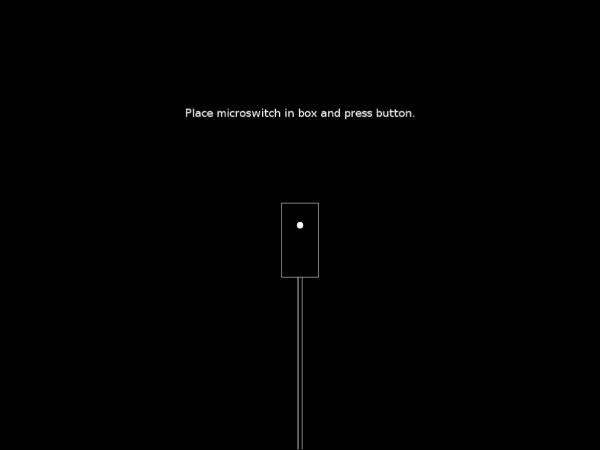 Hold the photodiode up to the rectangle on the screen
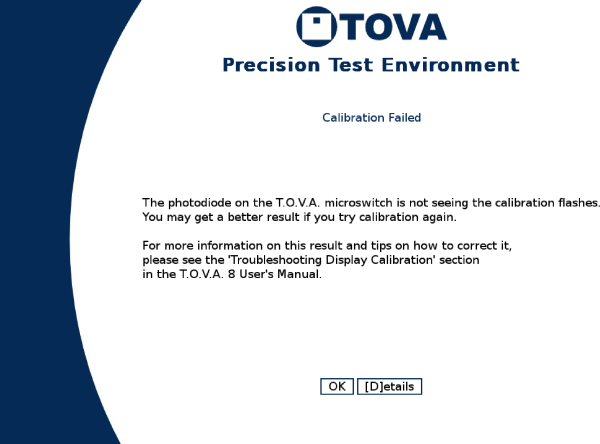 When calibration fails, try again, then consult this section
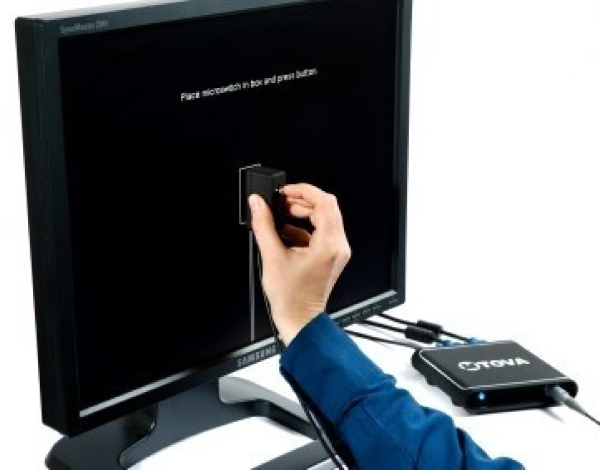 How to hold your microswitch for calibration
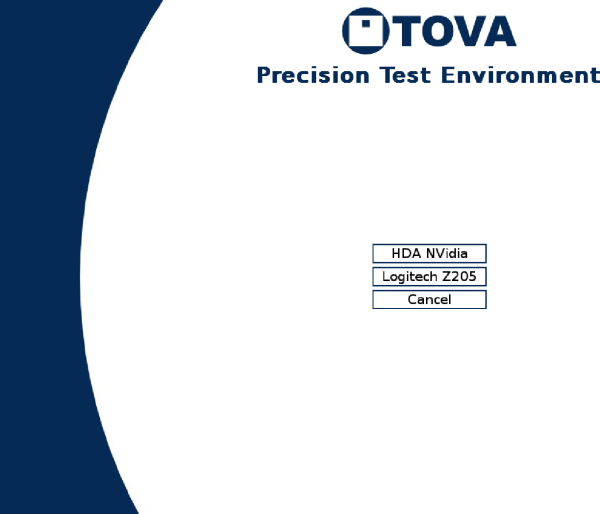 ‘[C]hange audio device’ brings up the audio device selection menu
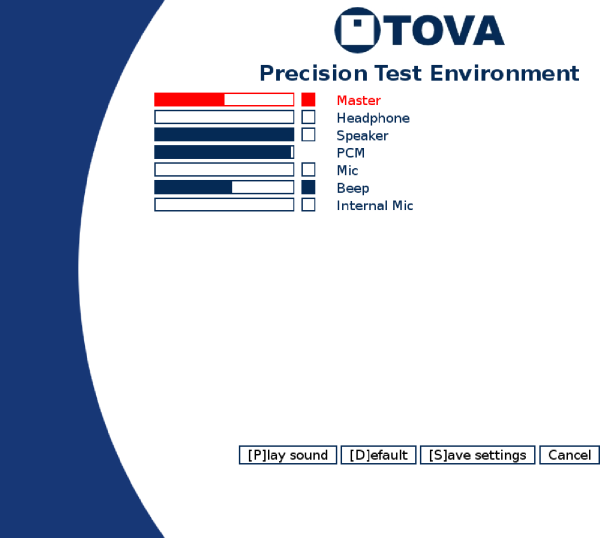 Only the Master and Beep channels are turned on here